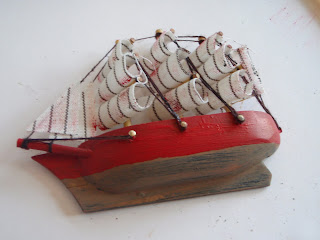
 So I want to show you the first step in making a fabulous pirate themed boys room. We are going to start small. Really small. With a magnet. I know, that seems silly, but I promise it will get us to an entire room soon enough! So step one is get your boat magnet. Maybe you get lucky and a family member gives it to you. Free boats are the best.
Grab your handy paints (I prefer acrylics as they dry faster and cleanup is EASY!) and lets get started. My boat had a lovely wooden deck, which I wanted to keep. But I didn't like the hull color. It needed some pizzazz! So I started by giving my hull a sandpaper massage to rough up the already painted surface. Then I gave my entire hull a coating of base brown. This gave me a great starting point for my colors.
Then I decided to add some color. After a little research (okay, google pirate boat pics), I realized that all the popular pirates have red boats. I guess they go faster or something. :)
Then I decided to distress the sails, as they were too white. I also added a lovely black line (use a toothpick) and some portholes. I went for square because it made me think of canon bays instead of actual windows. And what pirate doesn't want lots of canon bays? I also named my ship the "Sea Cat".
Then it was time for the flag. Every pirate ship needs a flag, so I cut a small piece of black fabric, added a white circle and some crossed straight bits.
Once the white was dry, I added some TINY black dots for eyes, nose, and a line mouth. Then I glued it on my middle mast.
Ta Da!!! Pirate Ship Sea Cat! And it was FREE!
I plan to attach this lovely pirate ship (which is only 3 inches wide) to the growth chart for the twins' room. Come back tomorrow to see how to make the growth chart for only $6!


No comments:
Post a Comment